Monday, January 30, 2012

New Design Team Announcement! And a Cameo Project

Hi Everyone!!!!!

So I have some super exciting news!!!!! 
I was asked by Michelle and Candace to join the Jaded Blossom Design Team!!!

I am soooo thrilled to be a part of this team, I am in love with their stamp line. If you haven't noticed I've already posted a lot of projects with their stamps on my blog, you can check them out here.

So here is my first project for the Jaded Blossom Team!


I used the Luck of the Irish set for my little button. How great is it that the St. Patrick's Day themed set can also be used for Valentine's Day!

So not only is this my first project for their design team but this is also my first project with my brand new Cameo!!!!!

Yes, my wonderful husband bought me one for my birthday!!!!

The box and the kissing couple are from the Silhouette store. 
The kisses paper is from the U and Me stack from Hobby Lobby
I used my Epiphany Shape Tool to make the button with the Kiss Me stamp from Luck of the Irish.
Then I wrapped some Cherry Cupcake Trendy Twine around the box.
Super Cute Right?!

Thanks for stopping by and make sure to check me and the rest of the design team out over at Jaded Blossom!


Sunday, January 29, 2012

Clean and Simple Valentine's Day Card

Hi Everyone!

Today I made a clean and simple card for a challenge over at The Glamorous Side of Scrapping.


So what do you think?
This is the first time I've made a card so simple, but I think it turned out cute!

Recipe-

Paper- Card (studio G card pack) Pink( scraps)

Stamp- Peachy Keen ( January SOTM)

Other- Doodle Hearts embossing folder(Paper Studio), Ribbon, Memento Tuxedo Black Ink, and a red glitter gel pen.

Wow, I never had a list so small, LOL. 
You have until Feb. 4 at 12 est. to enter the challenge, you can go here for all the details.

Thanks for stopping by! 
Check back tomorrow I'll be posting my first project made with my new Cameo!!!!

Thursday, January 26, 2012

Theme Day Thursday Bee Mine Card


 Today's themes are Birthday or Art Nouveau.

So I decided to use Art Nouveau for my card today.


I cut my base out at 6" x 12" in black, the pink is a 5 3/4" square and the white with polka dots is cut at 4".
I used a black gel pen to do stitching on the pink paper.  I used my Sew Easy on the white paper and stitched with Trendy Twine. I used Be Mine from Jaded Blossom and just stamped an extra e at the end of the word Be.


Here a close up of the bee, it was cut at 3". I  cut most of the layers with black, the wings are a silver pearl paper and after assembled I put Glossy Accents on top of the silver portion. I used silver stickles for the eyes. Then I cut the black striped paper at 1 1/2" x 2" , the white at 1 1/4" x 1 3/4 "and then rounded all the corners. I inked all the paper with pink chalk ink. The pink dots are Beads in a Bottle by Tulip.


The striped paper for the inside of the card was cut at 5 3/4" and the white was cut at 5 1/4". I wrapped some twine around the white and tied a little bow.

Recipe-

Cricut Cartridge- Art Nouveau

Paper- Paper Studio(U and Me) Core'dinations (black, white) Scraps

Stamps- Jaded Blossom(Valentine Treats)

Twine- Trendy Twine(Strawberry Cupcake)

Other- Sew Easy, Memento black ink, pink chalk ink, Silver Stickles, Glossy Accents, black gel pen, pop dots, Tulip Bead in a Bottle

Thanks for stopping by!
Make sure you stop by My Cricut Craft Room to see more projects from the Design Team!

Tuesday, January 24, 2012

Grand Opening of Erica's Craft Room Online and Retail Store!

Hi Everyone!
Most of you know I'm on Erica's Craft Room's Design Team, so I just want to share some wonderful news today about the Grand Opening of her new Online and Retail Store.


Here are the details for her Retail Store:

The retail location is
Erica's Craft Room
3312 S. Main Street
Akron, Ohio 44319
The store will open on Tuesday January 24, 2012
Store hours
Tuesday, Thursday and Sunday 10:00am - 6:00pm
Wednesday, Friday and Saturday 10:00am- 9:00pm
Monday -Closed (in-store and on-line)
 All in store, online and special orders are at least 10% off of retail.
There will be a large selection of in-store items that may not be on the website, such as ribbons, bows, stickers, certain stamps and more
There is a larger selection of items in the webstore.
Most orders will ship within 5-7 days, sooner if they are in stock. 

So Stop by the online store and check out the great selection or if your in the area stop by her retail store!
Thanks for stopping by!


Monday, January 23, 2012

Valentine Treat Box

Hey everyone!
I made this cute little box with the new Jaded Blossom stamps and my score board.


I found the tutorial for this little box here. I made it with Core'dinations white glitter paper and Valentine's paper that's from a pack from the $1 section at Target. I inked all the edges with red distress ink and then colored the cute little owl with my Copics and gel pens. 


Here's the inside. Both stamps used are from the I Hoot You set by Jaded Blossom. 
Then I tied some Berry Red Trendy Twine around the box to finish it off.

Did you notice the difference design on my blog? How cute is it?!!
Paper Crafts by Candace re-designed it for me and made me a button to match!
I just love it!!!

Thursday, January 19, 2012

Valentine Test Tube Holder

Today's my first individual post for Trendy Twine! Yay!
I made a Test Tube Treat Holder with Cherry Cupcake.


I used the the twine to tie on the little Be Mine heart to the top and then I knit the cute little scarf for this cute stamped girl from The Greeting Farm. I found the tutorial on how to make these holders here, but I made some adjustments which will be listed at the bottom of this post.


Here is a close up of the knit scarf, how cute is Trendy Twine all knit up!

Cut paper 4" x 12"
Score at 1/2", 1 3/4", 4 1/2", 5 3/4" while paper is horizontal
Flip to vertical and score at 1 1/4" x 2 3/4"
Flip back horizontal and score at 8 1/2" to 1 1/4" score then score from the bottom edge to the 2 3/4" score.
Pattern paper- Cut 1 piece at 1 3/8" x 3 1/4" Cut 2 pieces at 1 1/8" x 2 5/8" Cut 1 piece 1 3/8" x 2 5/8"

Recipe-

Paper- Paper Studio(U+Me)

Stamps- The Greeting Farm(Special Autumn) Random Stamp Set(Be Mine)

Twine- Trendy Twine(Cherry Cupcake)

Other- Copics, chalk, black ink

Thanks for stopping by!


Wednesday, January 18, 2012

Cupid's Heart Pillow Box Favor

I just wanted to do a quick post of this pillow box I just made.
I just got my full set of the all new Jaded Blossom stamps and had to make something.


How cute is that! I used Art Philosophy for the pillow box(6") and the tag(2.25" and 2.15")
I used the Trust in Cupid set and the Valentine Treats set.
Inked the edges with distress pink ink and tied the tag on with Cherry Cupcake and Strawberry Cupcake Trendy Twine.


Here's a close up of the stamped image.
You can buy both of these sets now and the rest of the release here.
You can buy this fantabulous Trendy Twine here.

Thanks for stopping by and make sure you come back tomorrow for my first individual post for the Trendy Twine Design Team!!!!


Monday, January 16, 2012

Zoo Train Invite

My Imagine-ation Monday and Letter C

Hi everyone! Well today's choices were either use your Imagine or the letter C over at My Cricut Craft Room.
So I made an Invitation with Create a Critter and Carousel-


I was thinking of doing a Zoo Train theme for my Son's 2nd birthday, so that's where my idea came from for this invite. The train is cut from Carousel- <Train1> 3", <Train3> 3", <Train4> 1.35". I cut the train out in black too, so I could cut the wheels off and layer on top.


The white base was cut twice at 9" x 4" and I used a punch to round the corners. I cut the ticket at 3.25" and made a pocket by just putting red tape on the edges on the back and attaching the other white piece.


I cut all the animals from Create a Critter. The Elephant at 1.6" (p.55) and the Monkey at 1.7"(p.46)
I hid the faces on my Gypsy and used Peachy Keen Faces.


The Koala was cut at 1.5"(p.49) and the Giraffe was cut at 2.9"(p.48)
I used 3 colors of Trendy Twine for the smoke and cut out blue and yellow strips to fit on the engine.
Then I did some stitching with a gel pen and inked the edge of invite with red ink.
And since I used so many Peachy Keen Faces for this I'll be linking it up to the Peachy Keen Linky Party too.

Recipe-

Cricut Cartridges- Carousel and Create a Critter

Paper- Core' dinations and scraps

Stamps- Peachy Keen(Wide Eyed and Bushy Tailed-Monkey)(Critter Faces Med.-Koala and Elephant)(Faceless Bugs and Basic Paper Doll - Giraffe) Your Invited(random set)

Twine- Trendy Twine(Peppermint Stick, Blue Berry and Twisted Lime)

Other- White Gel Pen, Chalk, Black and Red Ink.

Thanks for looking!

Make sure you stop by My Cricut Craft Room to see more projects like mine!


Tuesday, January 10, 2012

Valentine Pop Up Card

Today's Card Day Tuesday over at My Cricut Craft Room.

The theme for today's cards is Pop Up or use the I-Top.

Here's mine-


I love how this card turned out! You can go here for the tutorial. I think this card is such a neat idea, because you could always put a pocket on the front or back of the tag for a gift card.


Here's what I started with- 4.25" x 11" piece of card stock for the base. 2.5" x 5" piece for tag(stripe) and 2.75"x 5.25" piece for tag matting(polka dot). 1.5" circle punch and a scallop punch.( I wanted the circle inside the scallop but I didn't have a punch that size so I just reversed it) 
I cut the nuts from Handy Man at 2.5"(I hid the screw the cuts out with them on my gypsy)
The bolts were cut from Robots Party at 3.30". I cut 4 all together but 2 of them I hid the slits on so I could use them as a background layer.


Here's the tag and the base before it is all put together. I used 2 colors of Trendy Twine for the tag and around the base. I inked the nuts and bolts with black ink and stamped a Pink By Design Sentiment on a punched circle. The black border on the tag is from an EK Success punch.
Make sure that you leave enough space at the bottom of the tag for it to be attached to the base. I had to move my nuts and bolts up a few times it get it right.


The flat closed view of the card. I used foam squares to add the nuts on the front. 
I used my Crop a Dile to add the eyelet on the top to put the twine through.


Here's a close up of the tag.

Recipe-

Cricut Cartridges- Handy Man and Robots Party

Paper- Core'dinations (black pearl, white)Paper Studio(U+Me)

Stamps- Pink By Design(Tool Time)

Twine- Trendy Twine(Cherry Cupcake, Berry Red)

Other- Memento black and red ink, EK Success border punch, foam dots, Crop a Dile , and Eyelet.

Make sure you stop over at My Cricut Craft Room to see more projects like mine!

Thanks so much for looking!


Monday, January 9, 2012

Blog Award

I've been given a blog award from Marji over at Tiggerscraps and Kathy over at 3 Spoiled Dogs and a Cricut!  How sweet is that! They are both DT sisters on My Cricut Craft Room's team. Make sure you check out all the cute projects they have on their blogs.
Thank you both for thinking of me for this award!


Now, I get to give this award to 5 newbie blogs that I think are amazing! These blogs are all up and coming and have less than 200 followers

Here are the rules:
  • Choose 5 up and coming blogs of fewer than 200 followers to award the Liebster to.
  • Show your thanks to the blogger who gave you the award by linking back to them. If you are not a follower of theirs, that might be a nice way to show appreciation for the award.;)
  • Post the award on your blog.  Link back to the blogs you have given the Liebster to so everyone else can pay them a visit.
As a recipient it is now your turn to pick 5 blogs and share the love!


Make sure you go and check out these up and coming blogs! They've got some great projects! Become a follower and show them some blog love!

Don't forget if you were given this award to pass it on to 5 blogs with less then 200 followers.

Thank you Kathy and Marji for giving me this award!

Sunday, January 8, 2012

Erica's Craft Room 100 Cricut Cartridge Blog Hop Day 2

Welcome to Erica's Craft Room 
100 Cricut Cartridge Blog Hop


You should have come from Sheila's blog, if not please go to the beginning and start at Erica's blog so you don't miss any of the other fabulous projects!


I made 2 different Easel cards for my projects today.


My first easel card was made with Ribbons and Rosettes and Live Simply. The rectangle that says "a little hello" is cut at 1.75"x 2.5" and the brown is cut at 2"x 2.75" and then I rounded the corners with a punch. The patterned rectangle is cut at 2.25"x 5.75".


Here are the rosettes I cut. I used my gypsy and welded 2 together two times at 2.75" <Stamp1> If you don't have a gypsy you would just need to cut 4 and glue together, this way I only had to glue 2 pieces, the only downfall of welding them is you lose the score lines.


Here's everything else I cut and used. The main card it 6"x12" folded in half and then one half folded again. The white part is where you glue a 6"x6" square of the same color, only the bottom half of that square will be glued. The stamped squares were cut at 2.75" <stamp1md> and the shadow for it.(Ribbons and Rosettes) The snail is from Live Simply cut at 1.75"

Close up of the snail. I used Peachy Keen Stamps for the face and some Studio G glitter glue on the swirl. I inked everything with Memento brown ink, and did some gel pen stitching all over the card.

Recipe-
Cricut Cartridges- Ribbons and Rosettes and Live Simply
Paper- DCWV(Green Tea Stack) and Core'dinations white
Stamps- Pink by Design(Go Green) Peachy Keen (PK-279 Faceless Bugs) Random stamp set from Big Lots
Other- White gel pen, black and brown Memento ink, Studio G glitter glue, ribbon

The second card is a Twisted easel card which is super simple too.


Sorry I didn't take pictures while I was making this one. (Oops)
There is a great tutorial here for one. 
So here's what I did-
  1.  I cut a 6" x 12" and 6"x 6" out of white, then 1 cut 2 -5.75" squares out of the coffee bean paper.
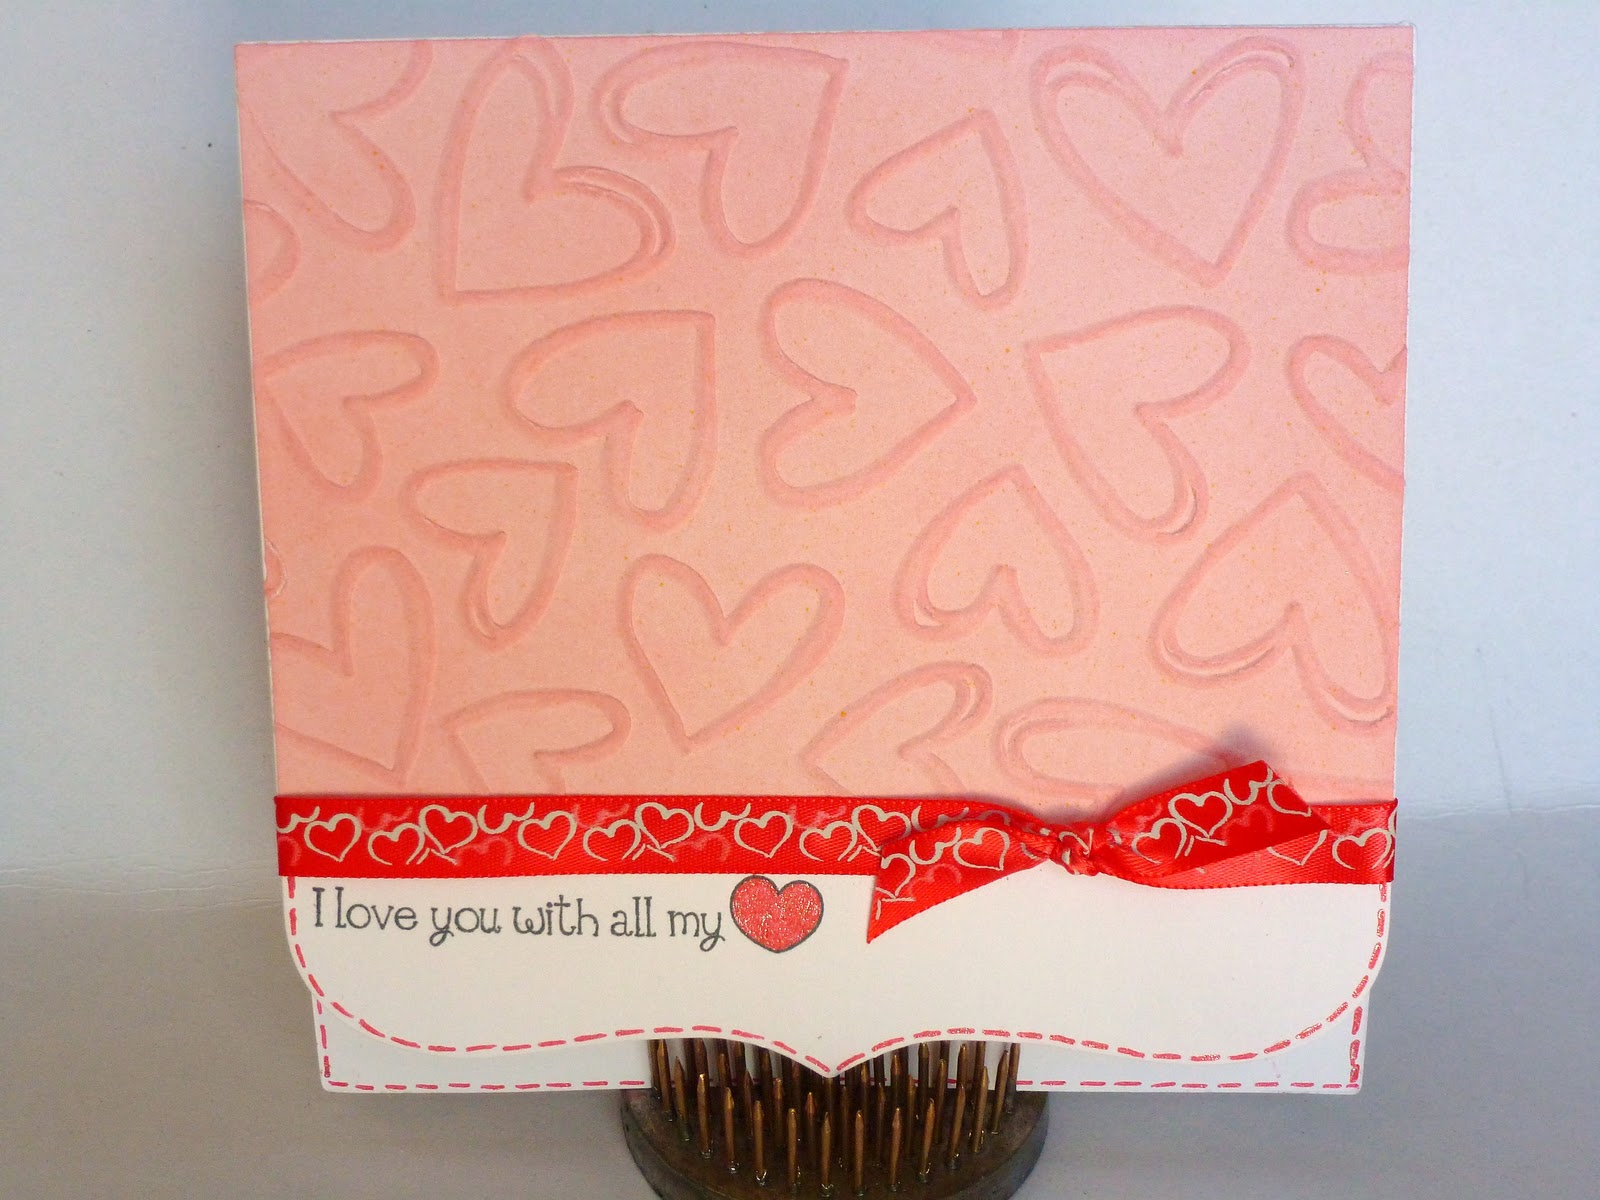
  2. I cut the background from Paper Lace at 5.5" <heart1> white is glitter paper  and red is pearl.
  3. I cut the shadow <Love-S> from Lacy Labels at 3" Real Dial size and then used my Sew Easy and twine for the hearts. I inked the edges with red distress ink. I also added a few stamped coffee beans.
  4. I cut <cofecup2> at 2.5" out of scraps and inked with brown ink and stamped the white part with a heart.
  5. I punched a 2" circle, inked it, stamped the sentiment on and used a foam dot for dimension, I used a Spellbinder die for the Happy Valentine's Day tag on the base and used foam dots to hold the card open. 
  6. Last I punched the heart border out of pearl paper and added the buttons with a little twine. I inked anything white with red ink and the brown paper with brown ink.
Recipe-
Cricut Cartridges- Love You A Latte, Paper Lace and Lacy Labels
Paper- Core' dinations(glitter, white) Recollections(red pearl)Coffee paper, Scraps
Stamps- Fiskars(Coffee Set) Studio G($1 stamp)
Twine- Trendy Twine(Cherry Cupcake)
Other- Sew Easy and Large Heart head, Copics, Tim Holtz Red Distress ink, Memento Brown ink, EK Success heart border punch, buttons

Thanks so much for stopping by!

Your next stop on the hop is Laurie

Here's the complete blog line up in case you get lost.

Erica's Cricut Craft Room- http://mycricutcraftroom.blogspot.com/
Jamie- http://jamiek711designs.blogspot.com/  (You are here)
Laurie- http://mincedpaper.blogspot.com/  (You're next stop)


Friday, January 6, 2012

100 Follower Giveaway winners!!!!


I just want to say thank you to all my new followers!!!

Here are the 3 winners!!!!

The winner of The Cricut Lite Cartridge is ....

Michele said...

Congratulations on your 100 followers! I am a follower already!

Michele http://chelescrafts.blogspot.com/


The winner of the CTMH Stamp set is....

Rae Ann said...

I just signed up as a follower. Congratulations on reaching over 100 followers.

Rae Ann O.  http://joyinart.blogspot.com


And the winner of the Trendy Twine Cherry Cupcake Sample is....

Candace said...

I liked your FB page!!! 

Candace  scrappin2littleprincesses.blogspot.com


Congrats to everyone! 

Please email me at jlieungh23@gmail.com with your addresses.


Thursday, January 5, 2012

Theme Day Thursday- Baby Boy

I've got some more exciting news... I joined the My Cricut Craft Room Design Team!
Here's my first project for the team, today's theme is Baby Boy so I made this super cute  "spring" card.


You can find the tutorial here. All you need is a 5 1/4"x 10 1/2" piece of card stock to make the base, it's super easy. One thing that I did that's not in the tutorial is glue the bottom triangle to the base of the card, It seems to help with the "spring" of the card.


Here's a close up of the baby. I used my Gypsy and hid the cut lines on the face so I could use Peachy Keen Stamps. The Baby is cut from Baby Steps at 3.5" and I used the largest face stamp from the asst. The printed square is cut at 3.5" and the lower rectangle is cut at 2 5/8" x 5 1/8". The sentiment is from Pink by Design.
I also wrapped some Trendy Twine around the square and ink the edges with a lime green ink.


Here is a pic of the back of the card the triangle on the left side of the picture is the one that is glued to the bottom.

Recipe-

Cricut Cartridge- Baby Steps(bbyboy2) pg.42

Paper- Me and My Big Ideas(Animal Kingdom-yellow dot) K & Company(Itty Bitty)

Stamps- Peachy Keen(Just Baby Faces Asst.), Pink By Design( Baby Love)

Twine- Trendy Twine(Twisted Lime)

Other- Gel Pens, chalk, ink, tacky tape, foam dots

Thanks for looking!
 Make sure you stop by this weekend for the 100 Cartridge Blog Hop!


Now head over to My Cricut Craft Room to see more projects like mine!


Wednesday, January 4, 2012

Giveaway is Closed.

Thank you so much to all my new followers for getting me over the 150 mark!!! 
And I'm almost to 100 on my Facebook page too!!!!!

I hope you all will continue to visit as I will have at least new project a week on my blog, but hopefully more.
I'm very excited to be on 2 Fantastic Design Teams and hope you all will enjoy my projects!!!

I will be posting the 3 winners on Friday so be sure to check back to see if you won!!

Good Luck Everyone!

Last Day to Enter 100 Follower Giveaway!!!!!

*****Giveaway is now over check back on Friday to see if your a winner!****

Today's the last day to enter my giveaway
You have until 10 pm CST to enter and don't forget to like my page on Facebook and comment for an extra entry!

 MAKE SURE YOU GO here TO ENTER.

As an extra bonus if I can get to 150 followers by the deadline I will pick one more winner to win a sample size(10 yds) of the new Valentine Cherry Cupcake Twine from Trendy Twine.


Giveaway 1( Cricut Lite Savory)


Giveaway 2 CTMH (Pair a Phrase Stamp Set)


If I reach 150 Followers by the deadline tonight I will giveaway this Sample of Cherry Cupcake Trendy Twine!

SO MAKE SURE YOU enter!!!


Tuesday, January 3, 2012

Valentine Rosette Wreath

Today is Trendy Twine Tuesday Challenge Day over on Trendy Twine's Blog. 
You can head over there to see all of the fabulous projects done by the entire design team featuring the new Cherry Cupcake Twine. Plus the new challenge for the month is up and you can win 30 yds. of Cherry Cupcake Twine! 

I'm so excited to be posting my first project for the design team today!!!

So here it is...


I think the Cherry Cupcake Twine goes so great with the paper stack I used. I tied bows with it on all the buttons I used.


If you've never made a rosette before this is what they look like after you score, fold and glue.
I make mine in 5 sizes- 1", 1.25",1.5",1.75" and 2" x 12" strips and score every 1/2". I just use 1 strip for the 2 smaller sizes and 2 strips for all the rest.


I punch a bunch of 1" circles, flatten the rosettes and hot glue the circle to the back. Then all that's left is the decorating. I cut a wreath out of chipboard with my Cricut and hot glue all the rosettes onto it.

Recipe-

Twine- Trendy Twine( Valentine Cherry Cupcake)

Paper- Momenta(I Love You)

Cricut Cartridge- Art Philosophy(circle for wreath)

Stamps- $1 stamps from Walmart and a set from Big Lots

Other- Gel Pen, buttons, rhinestones, ink, Epiphany Shape Tool, stickers

Thanks for looking!

Make sure you stop by Trendy Twine's blog to see the rest of the design team's projects. 
Also for your chance at winning 30 yds. of Cherry Cupcake Twine enter the Challenge for the month "Make a Project for your Valentine." 
And don't forget to stop by the store and pick up your own full spool or sampler of Cherry Cupcake!


Monday, January 2, 2012

Another Baby Girl Album

Here's another Baby Girl Album I made for my friend's sister. It's pretty similar to the first one I made, but I think it still turned out super cute.

Here's the cover-


The base of the album is cut from Art Philosophy at 5.5" The title is from Nursery Rhymes cut at 2". The flower is from my stash and I put a bow made out of Trendy Twine's Cherry Cupcake.


I used Baby Steps for all the babies cut at 2" except the sleeping baby is cut at 1.5" and Peachy Keen for their faces.


Most of the sentiment stamps are from Pink By Design.


I used Splish Splash from the Splish Splash Lite Cart cut at 1". The stamp with the sleeping baby is from a Fiskars baby set.


Inside flap from sleeping page.


Storytime was welded with the Nursery Rhyme font and I made tags for a few pages to write little notes on.


The onesie stamp is from The Greeting Farm.

Recipe-

Cricut Cartridges- Art Philosophy, Baby Steps, Nursery Rhymes and Splish Splash

Paper- K and Company (Itty Bitty), Recollections( Glitter Paper) Core'dinations(Gemstones)

Stamps- Pink By Design(My Type, So Big, and Baby Love) Fiskars( Precious Baby Quotes) Peachy Keen(Just Baby Faces Asst. and Just Baby Faces 1 1/8") The Greeting Farm(Build a Onesie Girl)

Twine- Trendy Twine(Cherry Cupcake), The Twinery(Lemondrop)

Other- Cereal boxes, Cinch Binder, Tim Holtz Ink, Memento Ink, gel pens, Stickles, Chalk, Copics, ribbon, scallop circle punch, square scallop punch and ABC punch.

Thanks for looking!

Don't forget about my giveaway! You have until Jan. 4th to enter here.